DIY Super Mario Bros. Movie Costumes
Author: Annie and Ryan (Lost and Farm)
October 31, 2016
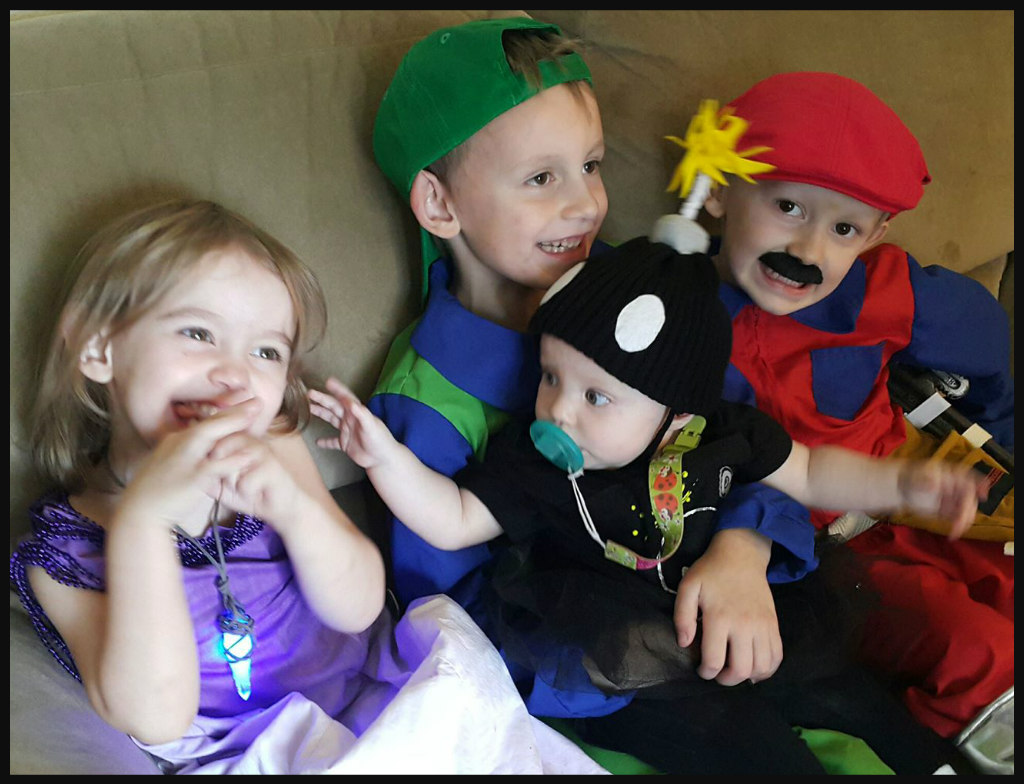
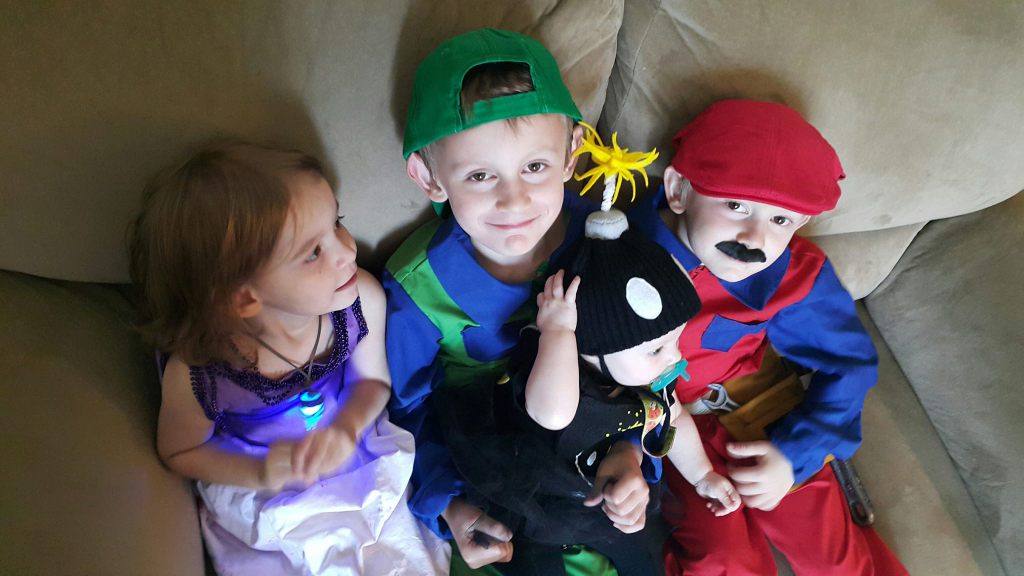
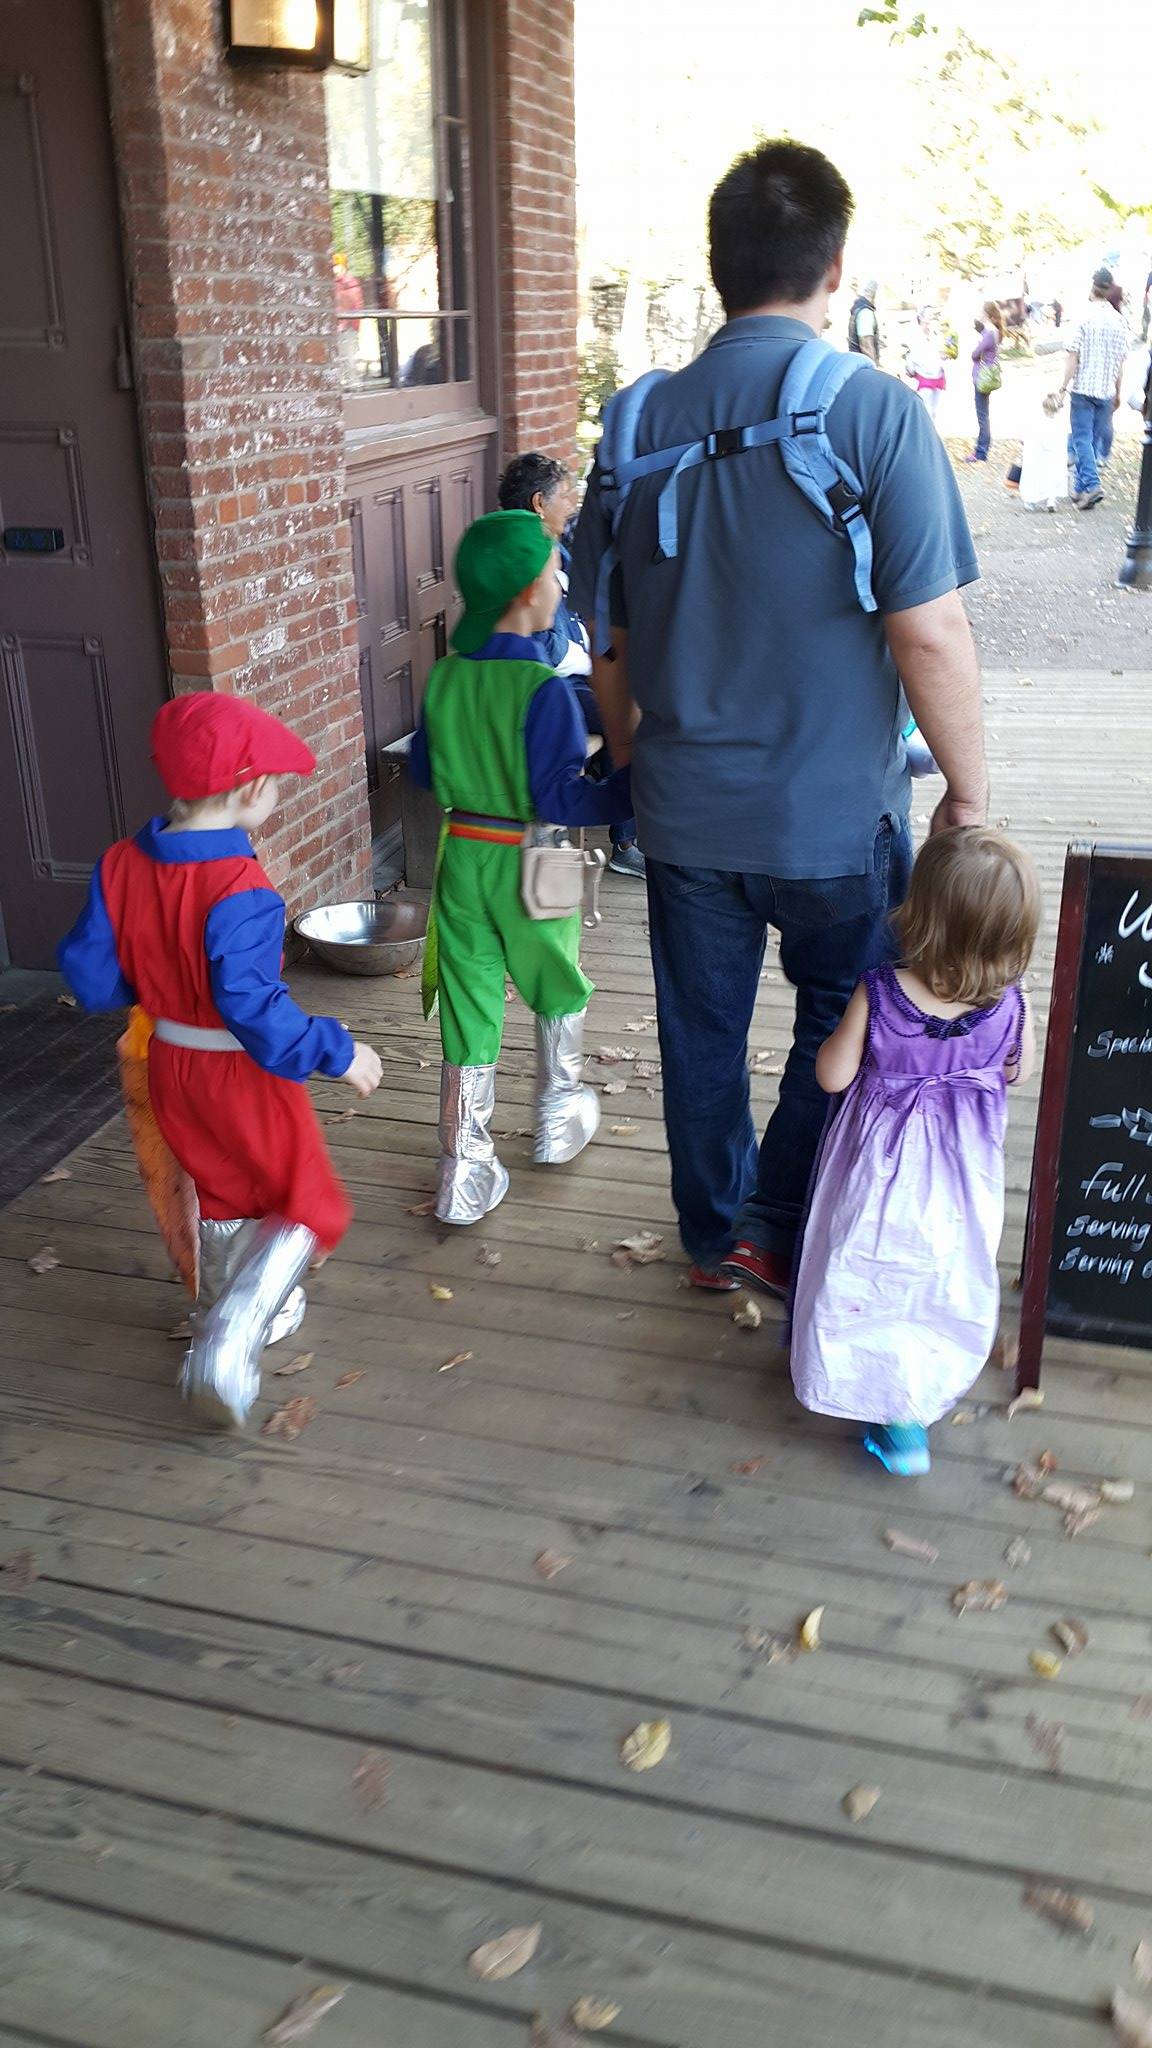
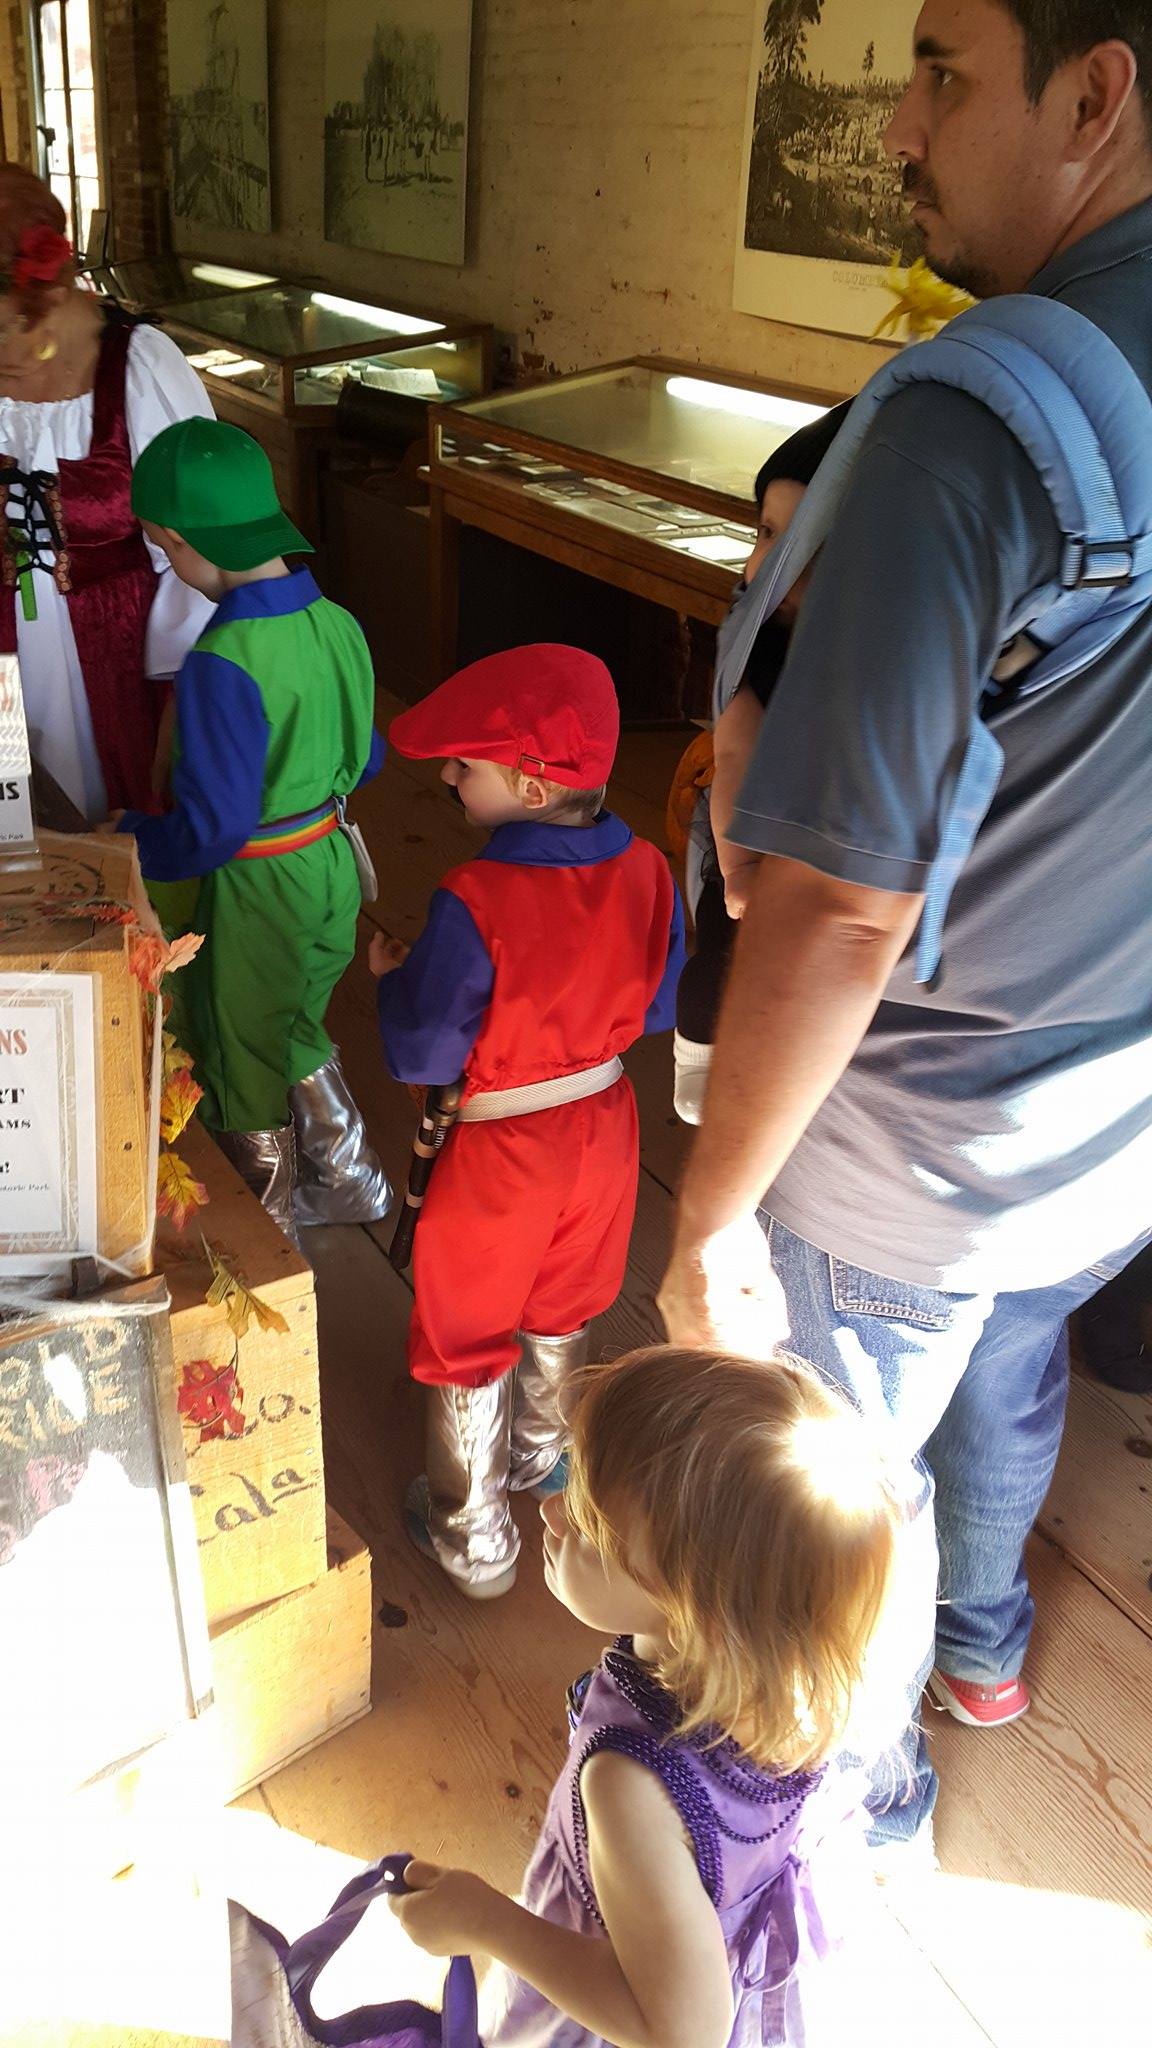
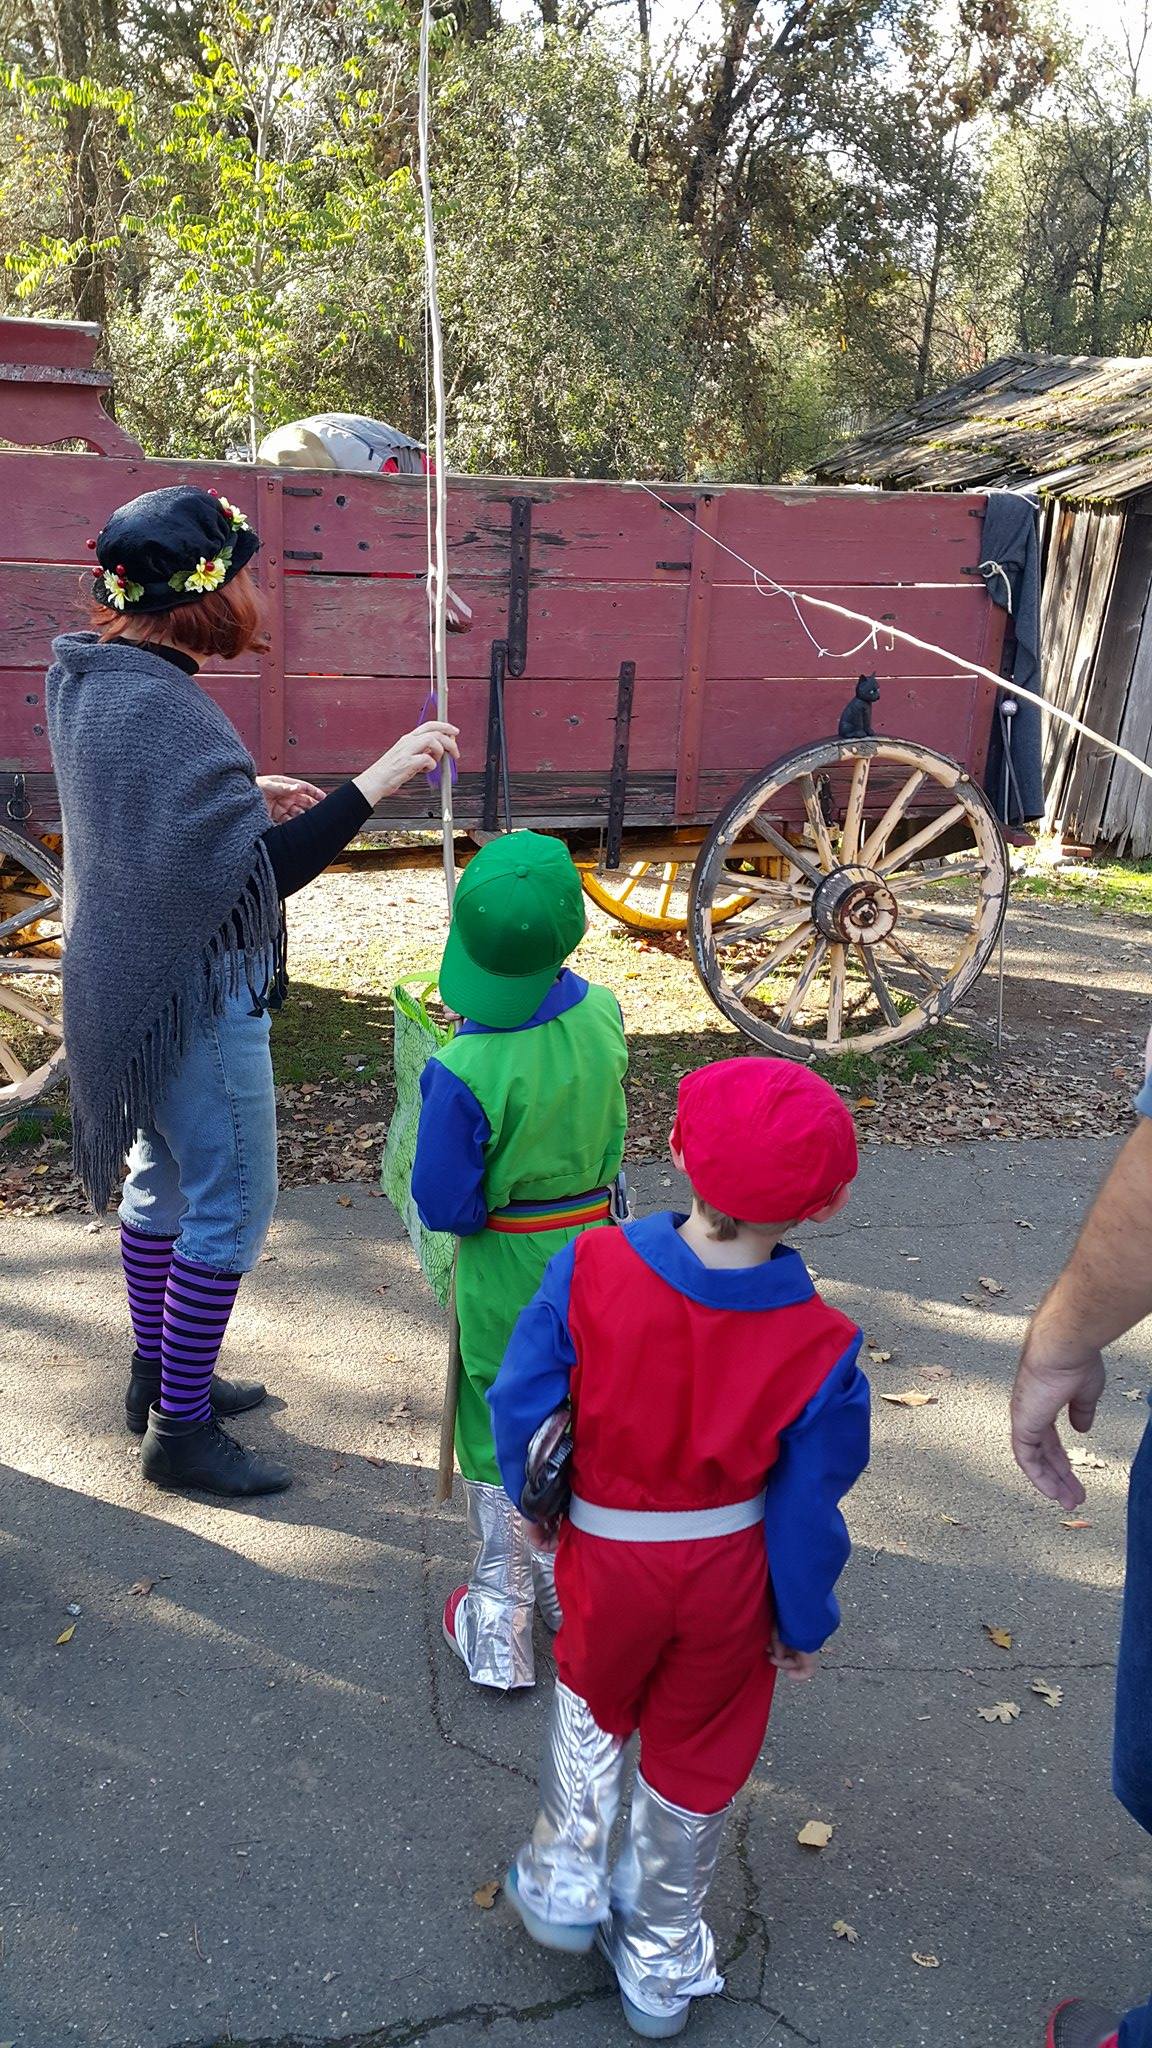
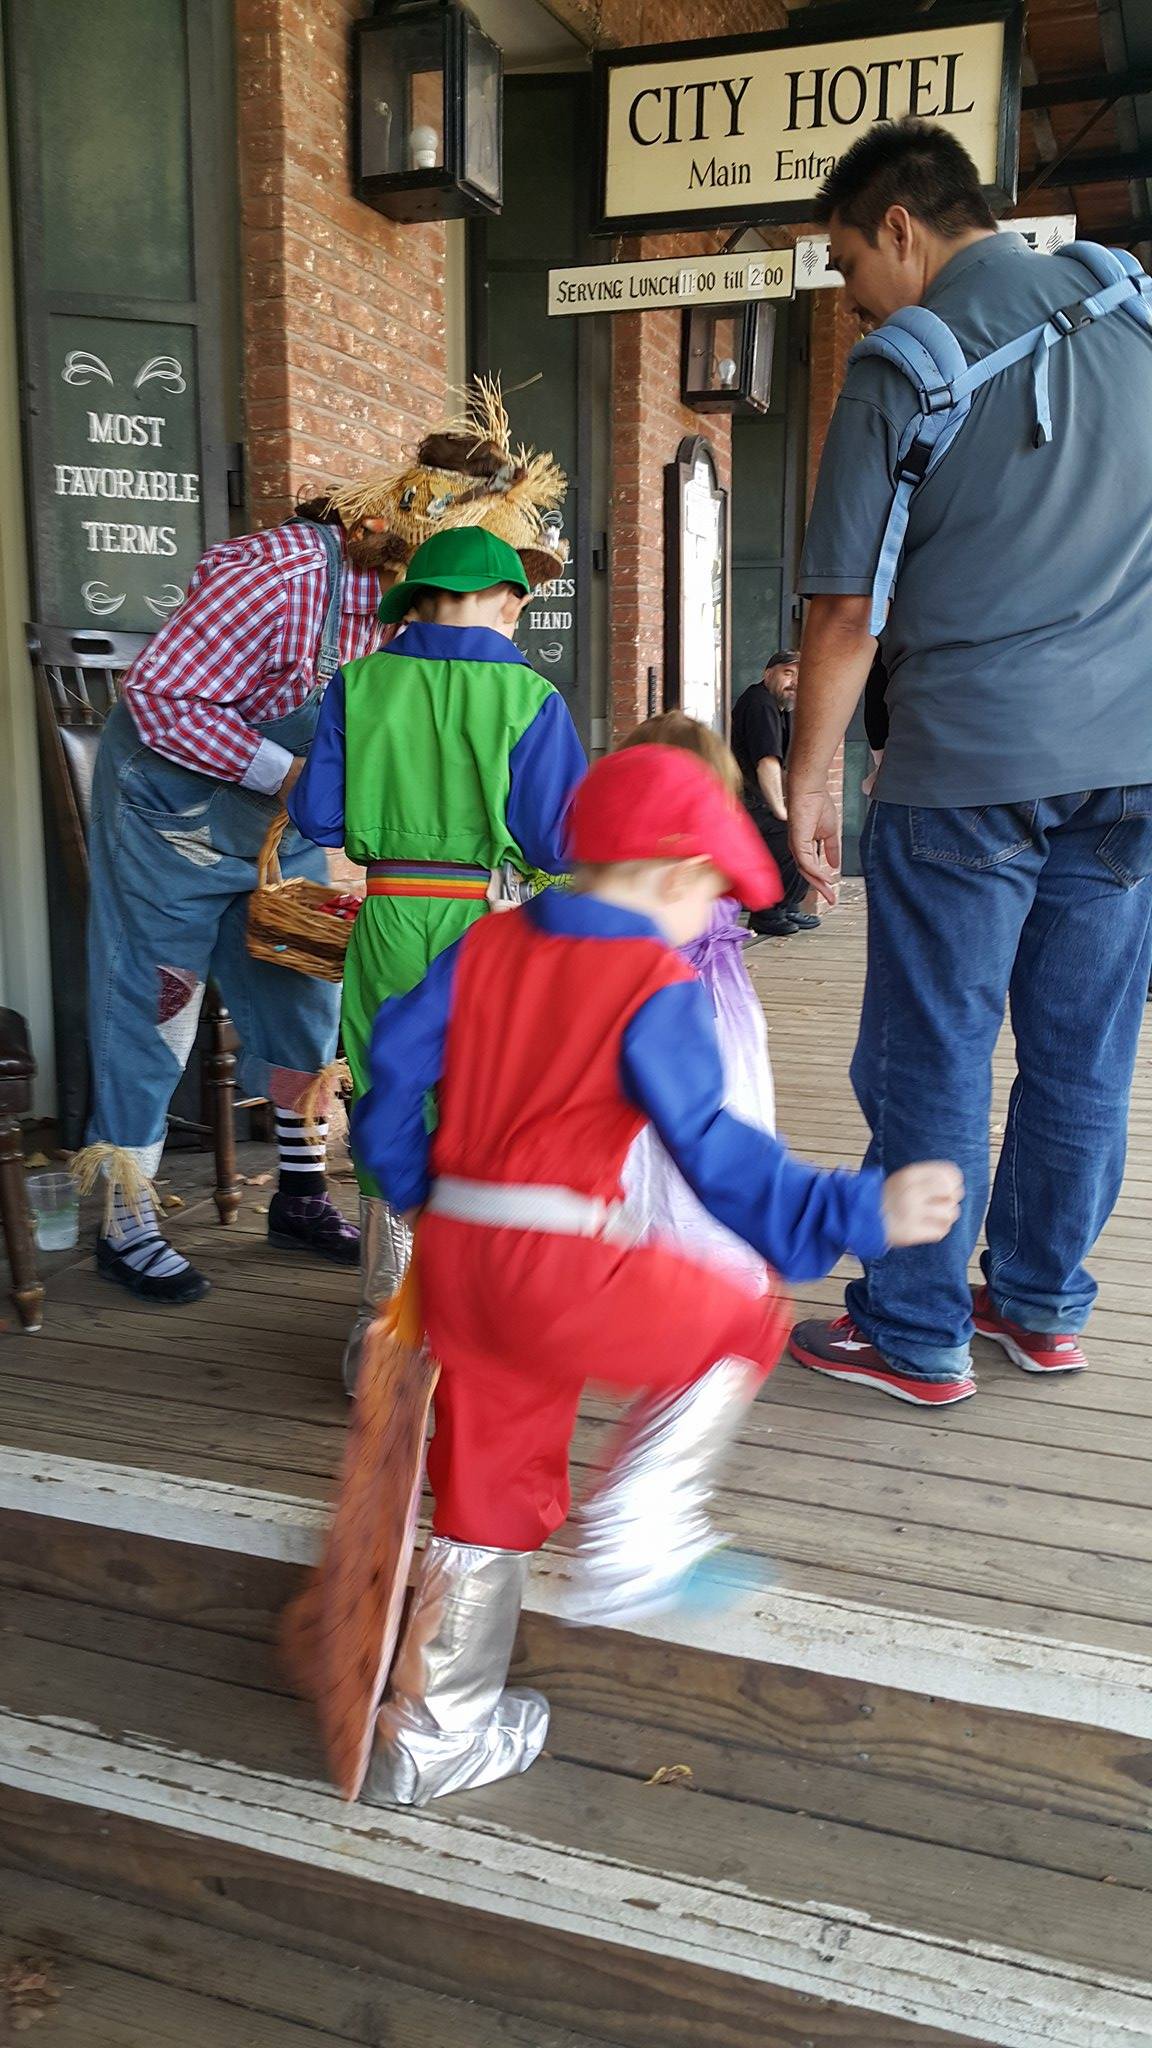
Happy Halloween! Now for the moment you’ve all been waiting for: Unveiling this year’s costume theme! I’d say “drum rolls please” but if you haven’t already figured it out from the title and photos then no amount of tongue-rolling and lap patting is going to help you… We chose the Super Mario Bros. movie this year! I know, I know: That film has been long regarded as the worst thing to come from the Mario and Luigi franchise. But hear me out: MY KIDS THINK IT’S AWESOME… and so do my husband and I! And we’re not alone. When we took the kids to some pre-Halloween trick-or-treating events numerous parents our same age *gushed* over the costumes and reminisced about their own childhoods and fondness for the film. So yeah, it’s definitely reached a “cult classic” level of popularity. Of course there were significantly more responses of “Look at the matching garbage men/mechanics/painters!” and one guy who actually complimented JD on his “cool Spiderman costume” (to which JD just shrugged and said “Okay” because he knows better than to argue with the person holding the giant bowl of candy) but those who recognized them said we made their day. So yeah, we’ve got that going for us.
If this is your first time visiting the blog, you should know that Halloween costumes are kind of a big deal around here. I’ve written past articles about our budget-friendly costuming process and even done tutorials for specific costumes (like our “The Hobbit” theme from last year). Thanks to Dharma Trading Company generously agreeing to provide supplies for one of this years four costumes, I’m able to do BOTH this time! So check out how I pulled together this year’s costumes in this article then visit the step-by-step tutorial on how to make the most challenging of the four outfits. So let’s dive right in…
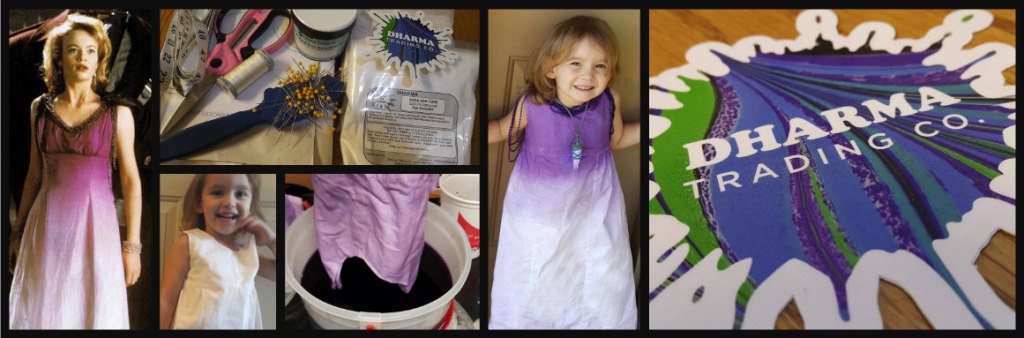
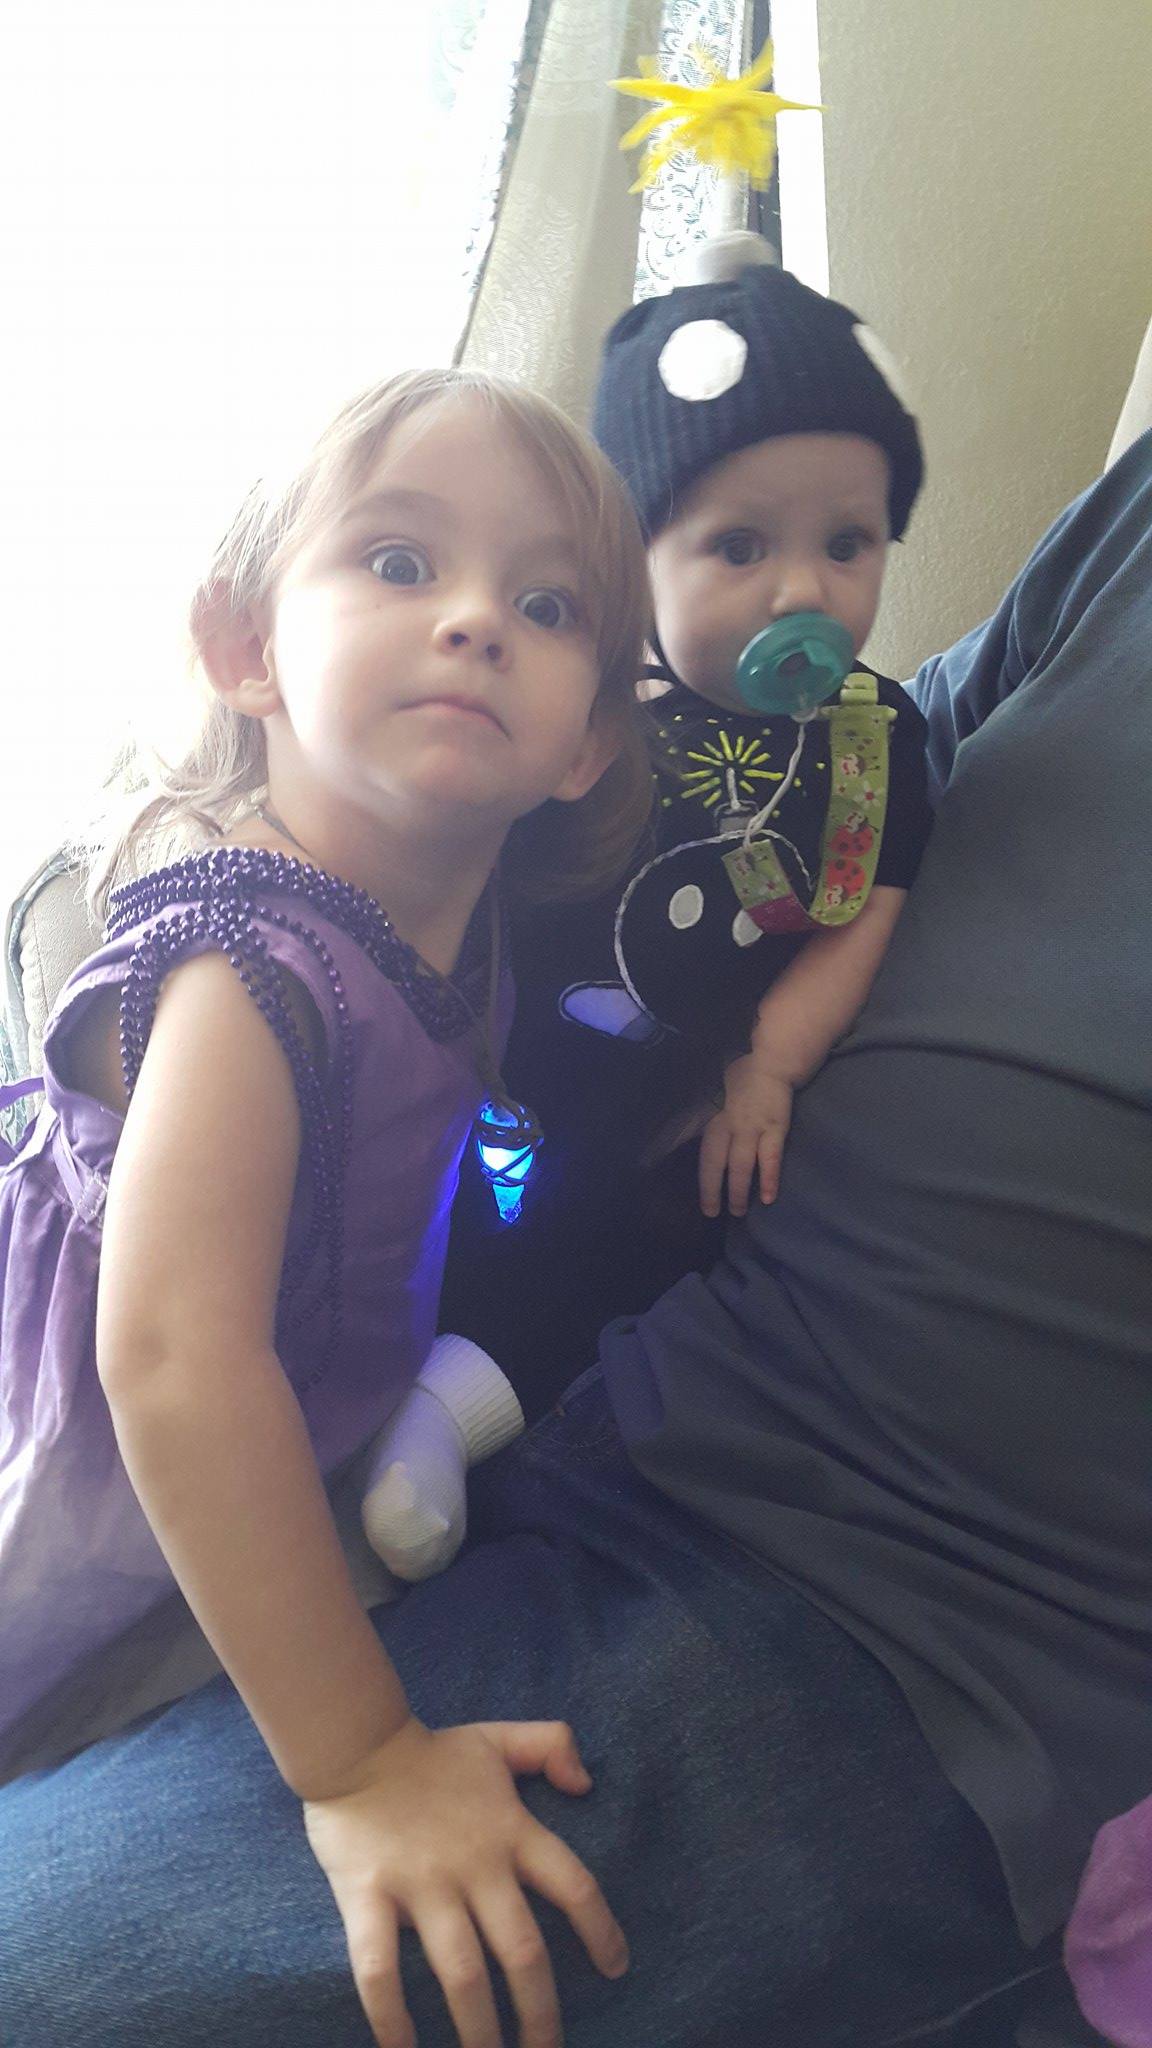
This is the “most challenging” costume I was talking about. Princess Daisy’s dress had to be sewn from scratch, ombre died and trimmed by hand with strands of beads. I can’t thank Dharma Trading Company enough for providing the fabric and dying supplies. I’m excited to be able to share my experience using all the amazing products first-hand and I definitely have plans for future dying projects (but that’s for another article). Today we’re talking costumes! Did I mention the glowing meteorite necklace I made with a hot glue gun?! Yup. Check out the detailed step-by-step guide that includes everything from where to find the sewing pattern FOR FREE, the exact materials I used, instructions on how to actually do ombre dying and hilarious stories about burning myself with a hot glue gun. Okay, so maybe it isn’t “hilarious” or even “a story”, but I did burn myself with a hot glue gun.
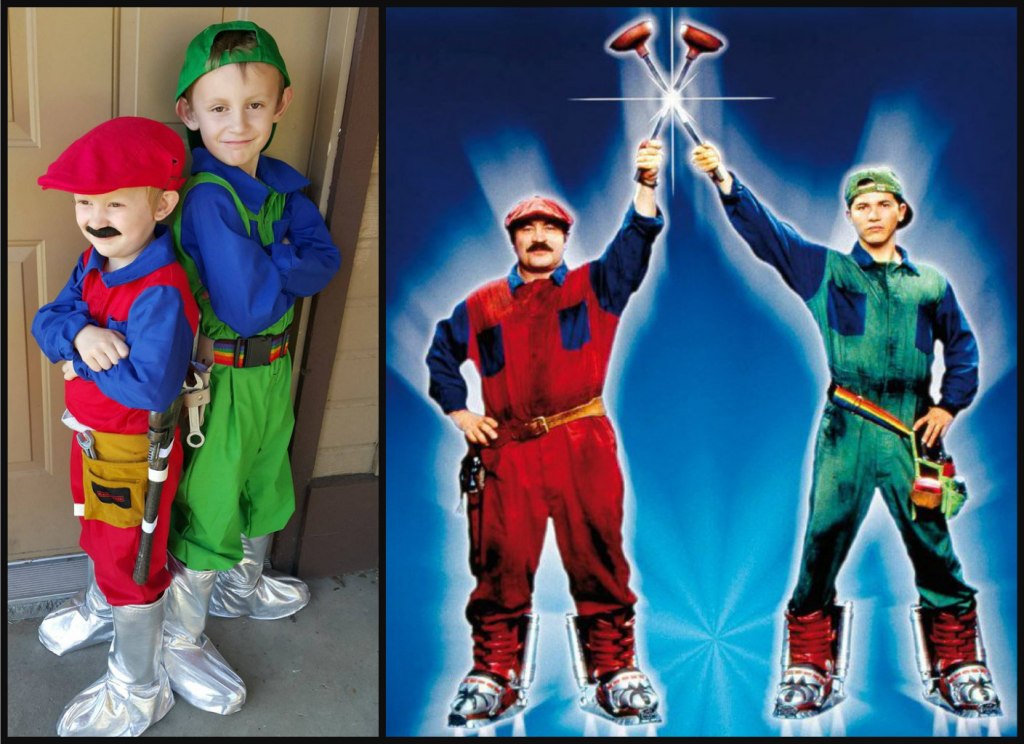
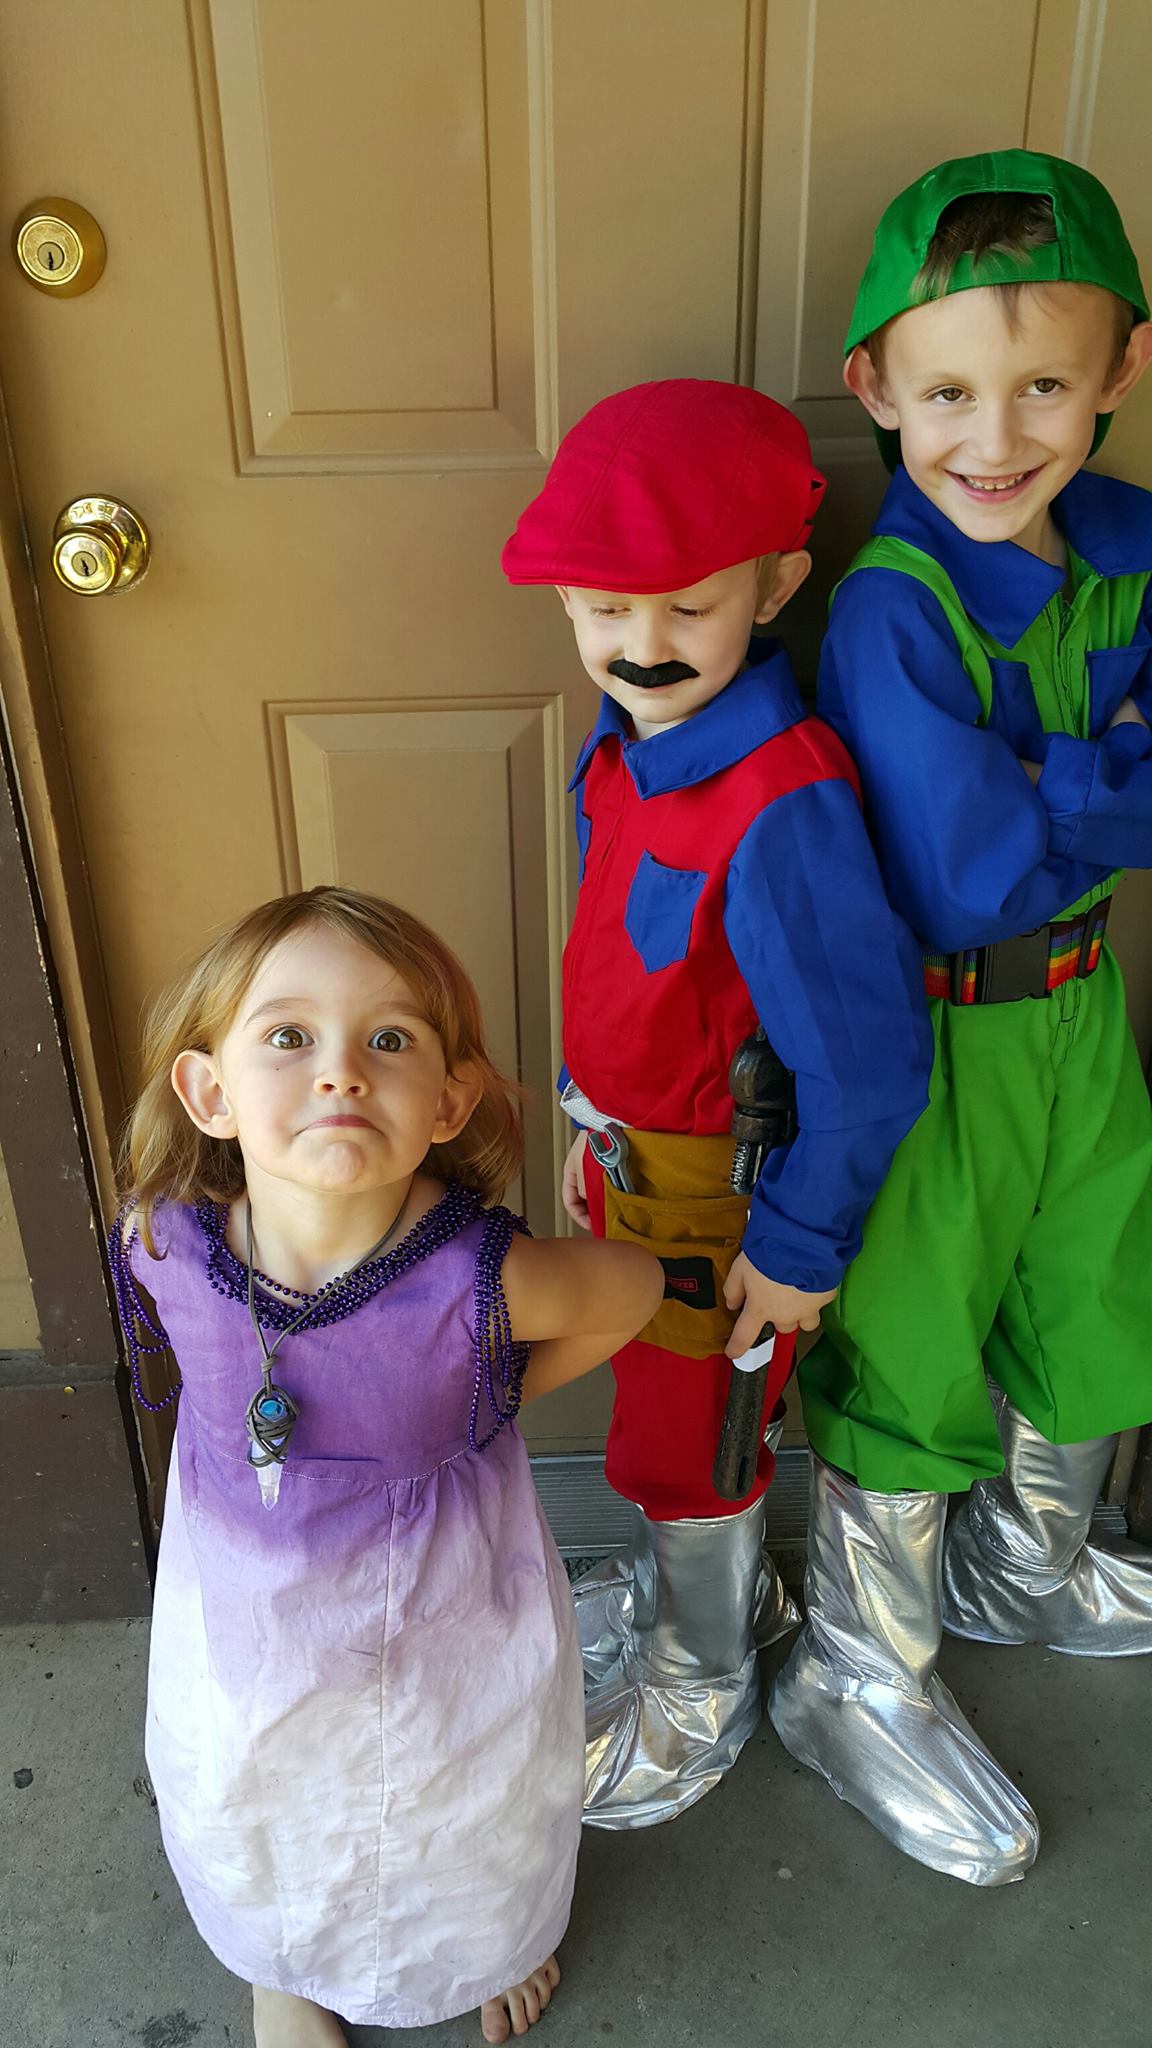
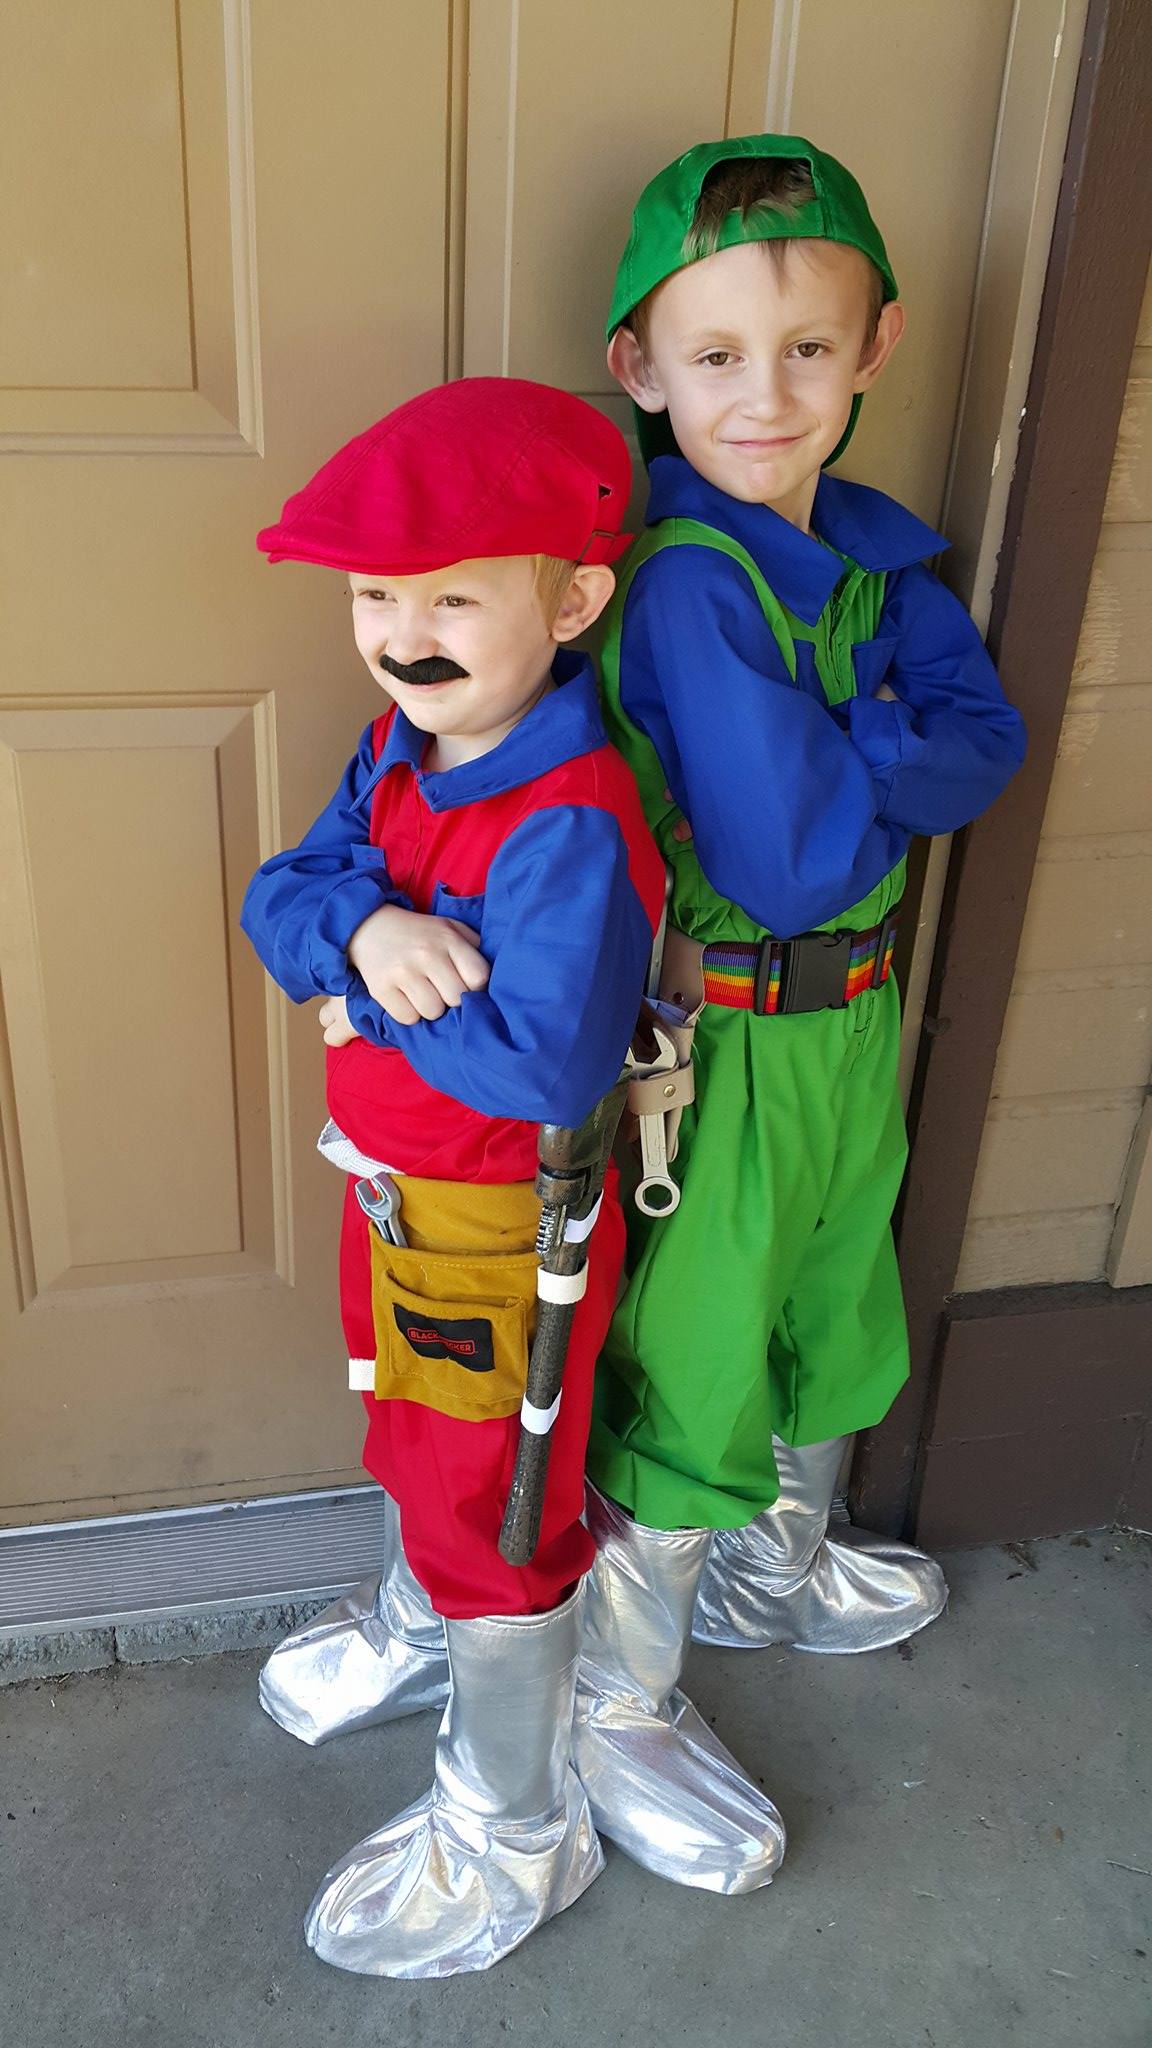
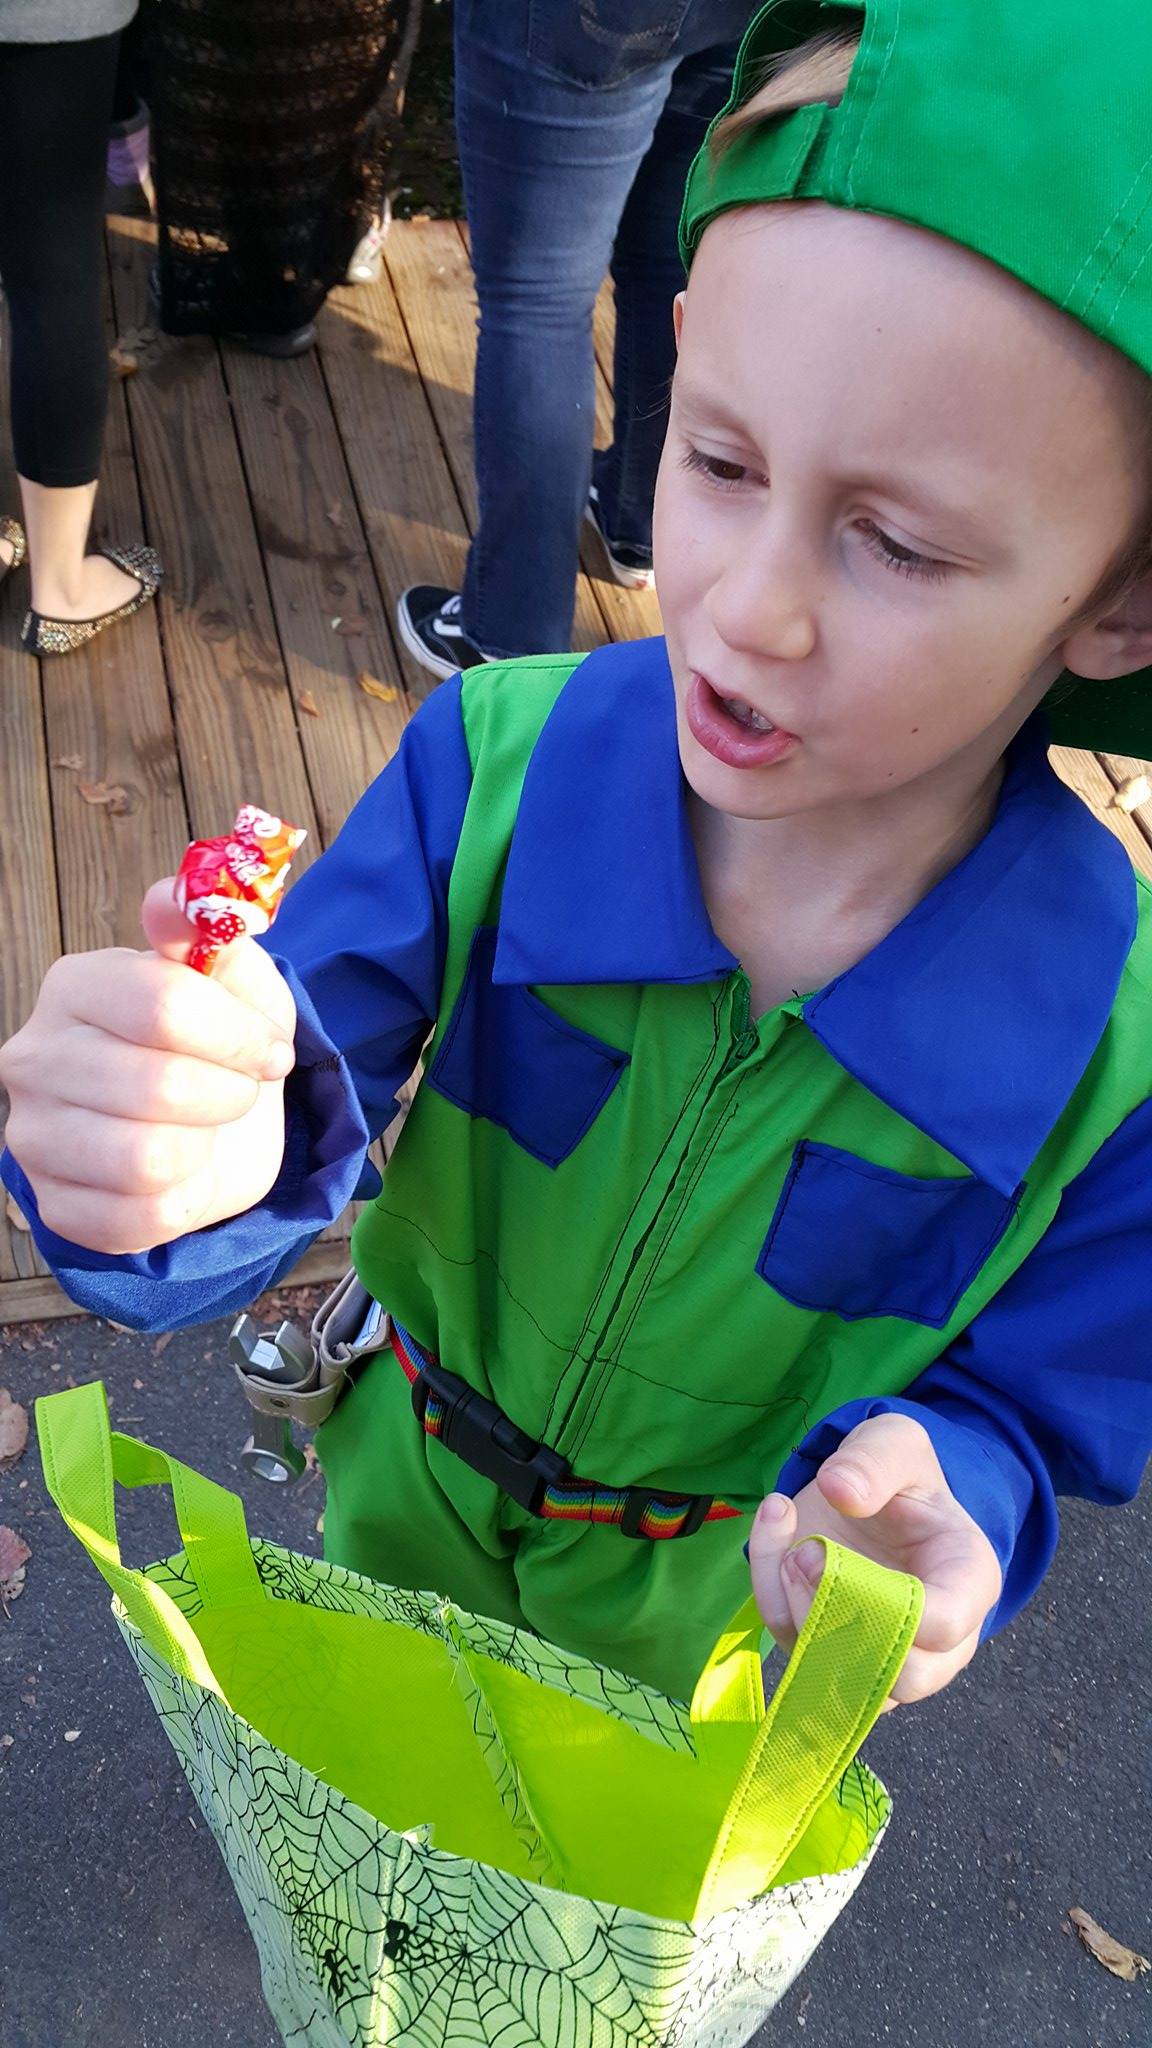
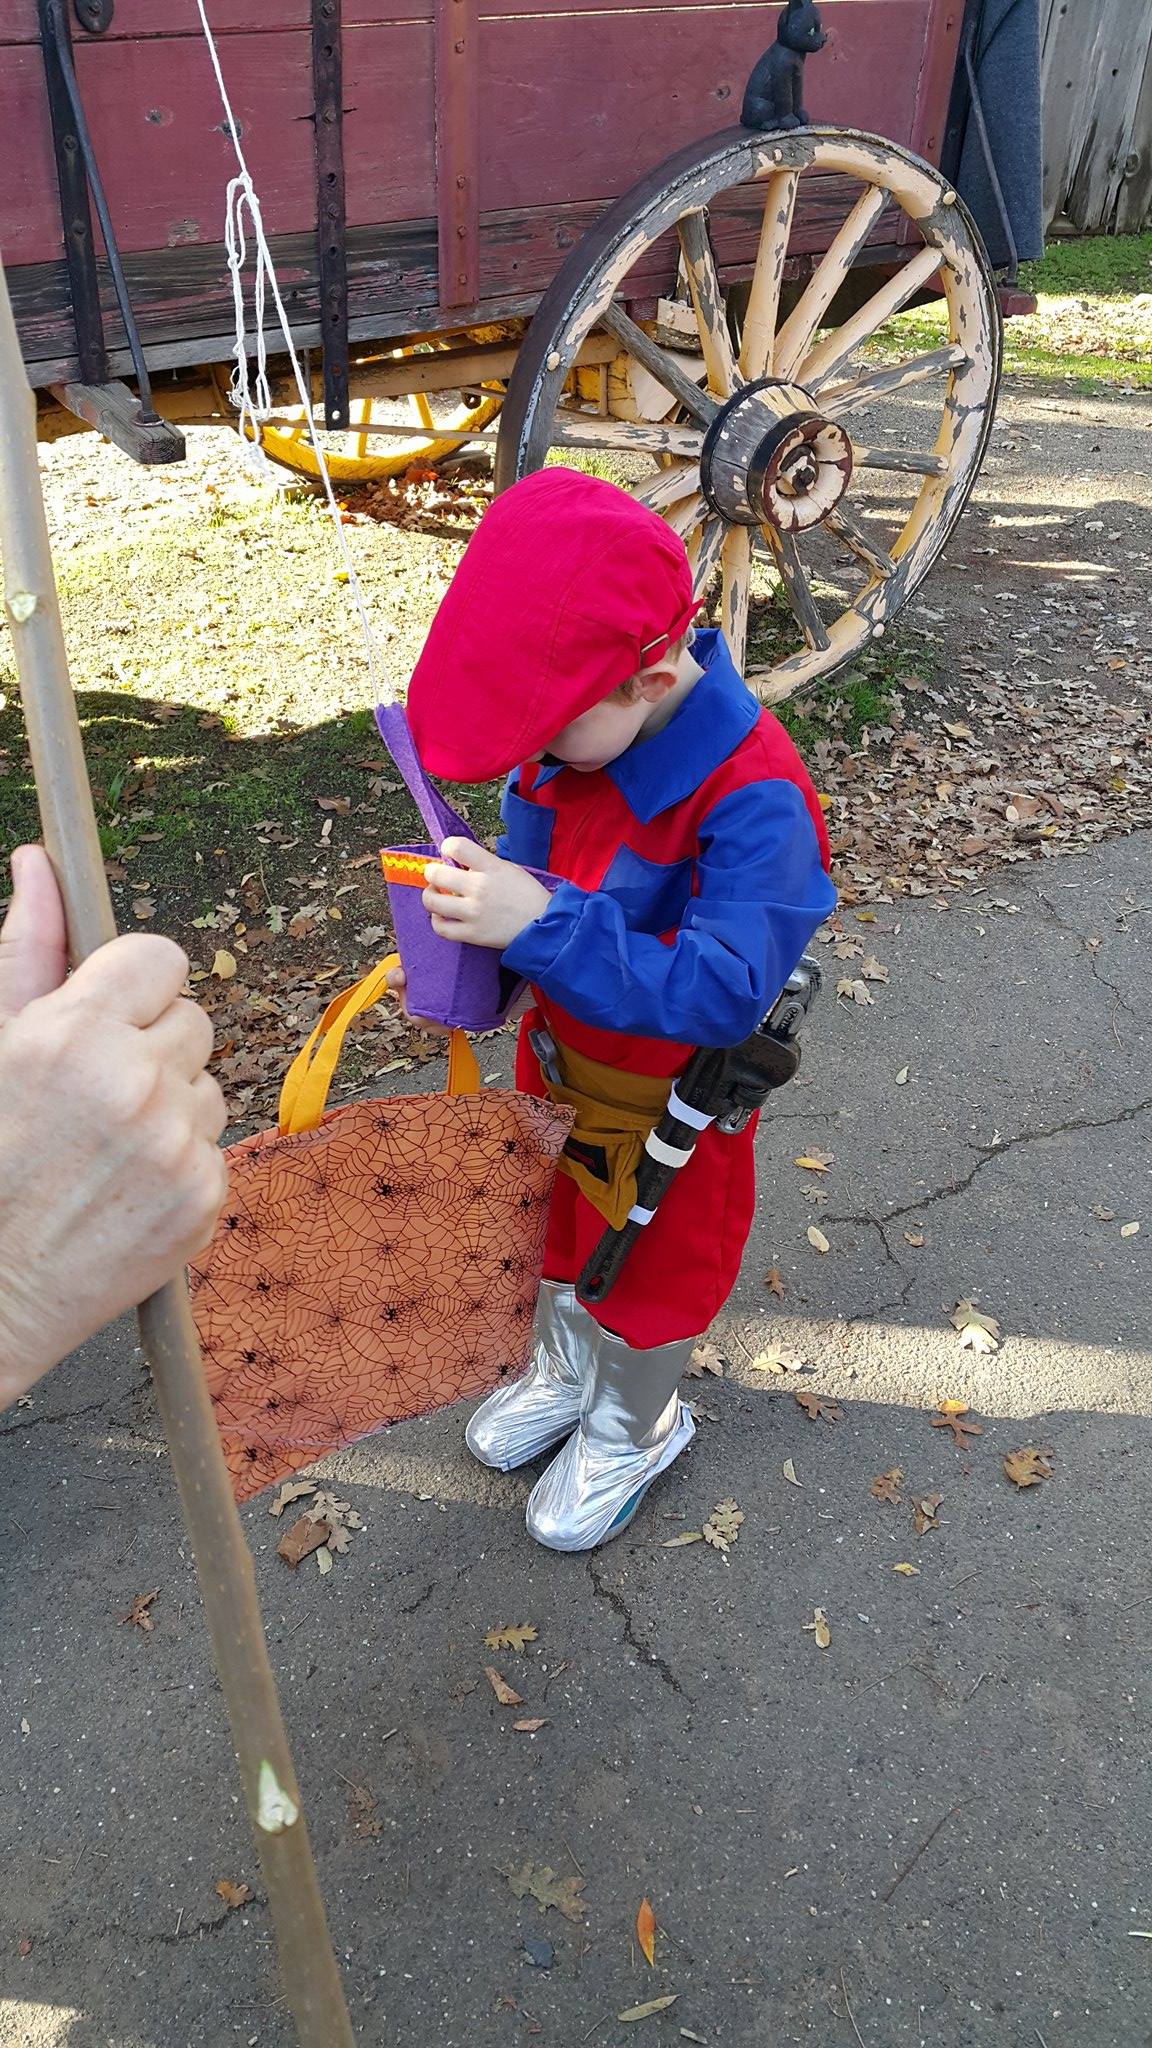
I don’t normally group two costumes into one category but let’s be honest: It’s the same costume. In different colors. With different hats. I did lengthen the arms and legs on the pattern by 2″ when I made Charlie’s Luigi costume though. So there’s that, I guess.
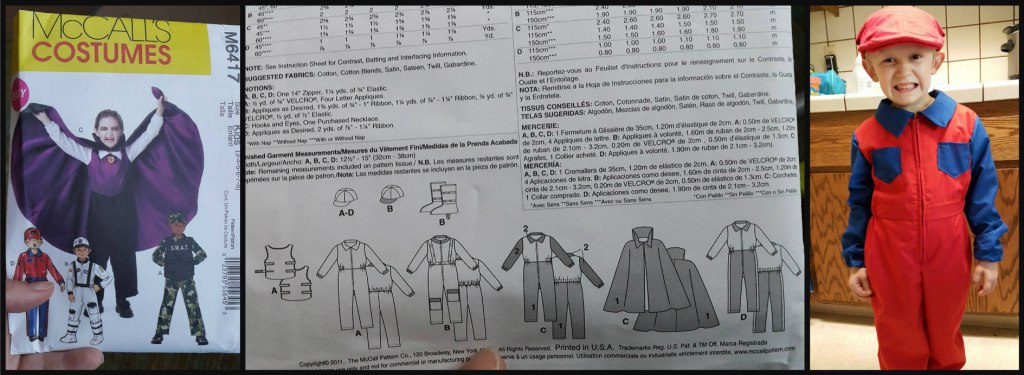
I started with a McCall’s pattern M6417 that I had in my collection of patterns that family members have sent me over the years. It’s intended for a “Vampire”, “Race car driver”, “Astronaut” and “Swat team member”… which, let’s face it, sounds like the punchline of a very inappropriate joke. As you can see from the back of the pattern though, it took very little alteration to use it for the iconic Mario and Luigi jumpsuits. In the spirit of full disclosure, I’ll actually share the secret to my Mario Bros. costume-making success: Pockets. Yup. I added pockets.
My supply list involved a very weird Amazon shipment:
I also bought a clearance $2 yard of silver fabric remnant at the local fabric store. The other belt, tool pouches and plastic tools were either already ours or hand-me-downs from friends. All together, Mario and Luigi cost me $34.90 or approx $17.45 each. I could’ve cut the budget in half by making the hats myself instead of buying them but with a new baby in the family I had to be realistic about my time constraints. When you’re a parent, time is your most valuable asset and spending 5-6 hours to make things I could buy for about $16 didn’t seem reasonable at the time. You’re own situation may not allow it though. No shame either way!
The important thing is that the boys ADORED their costumes:

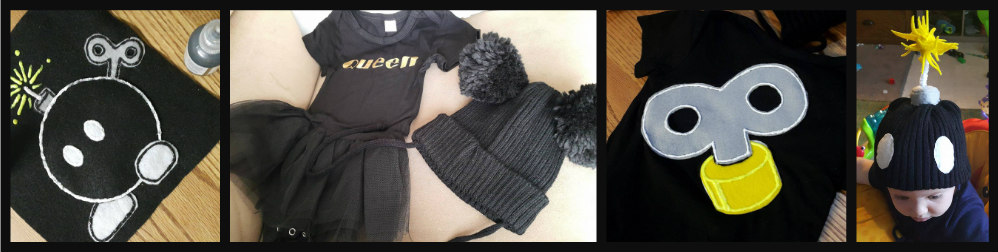
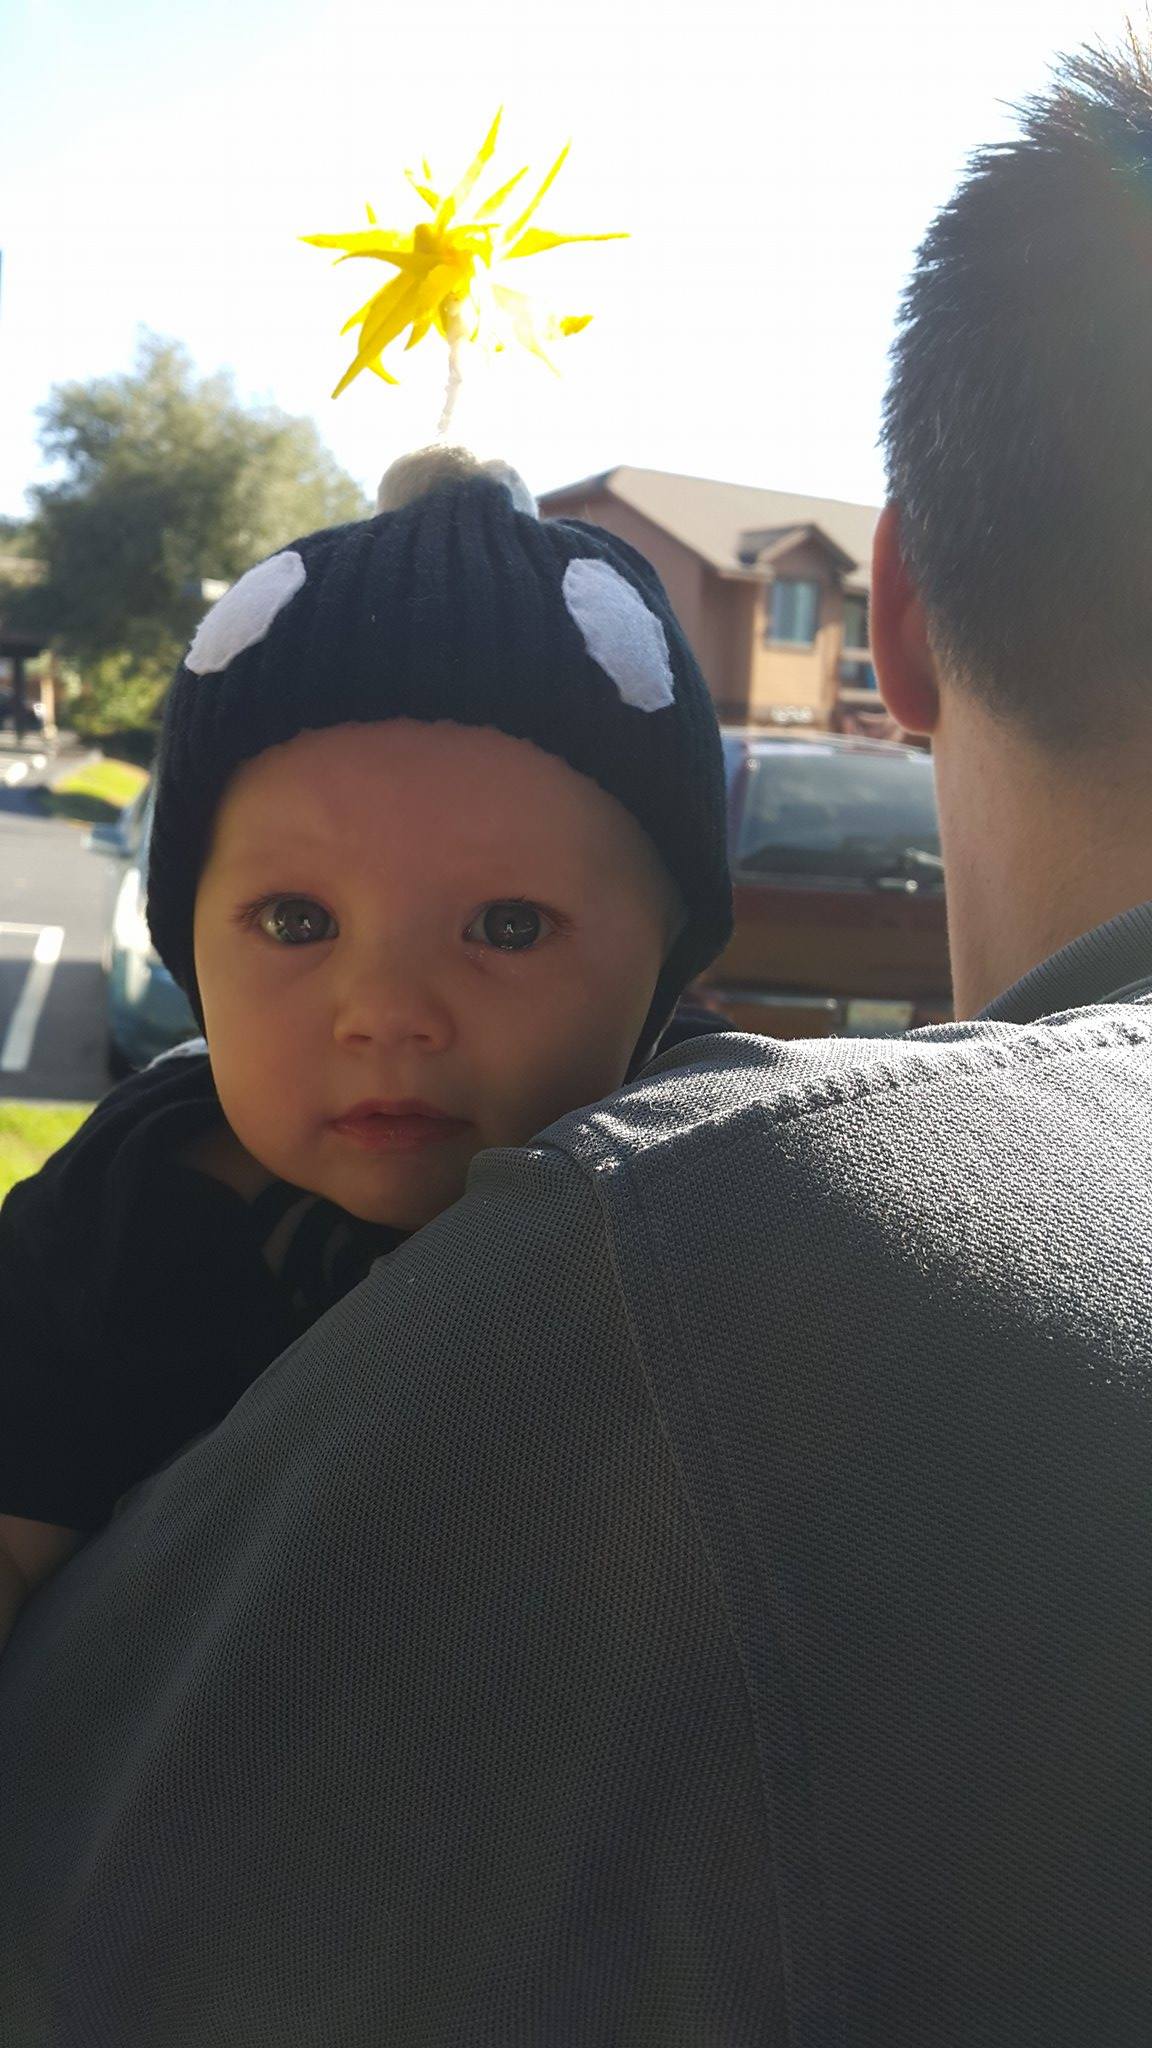
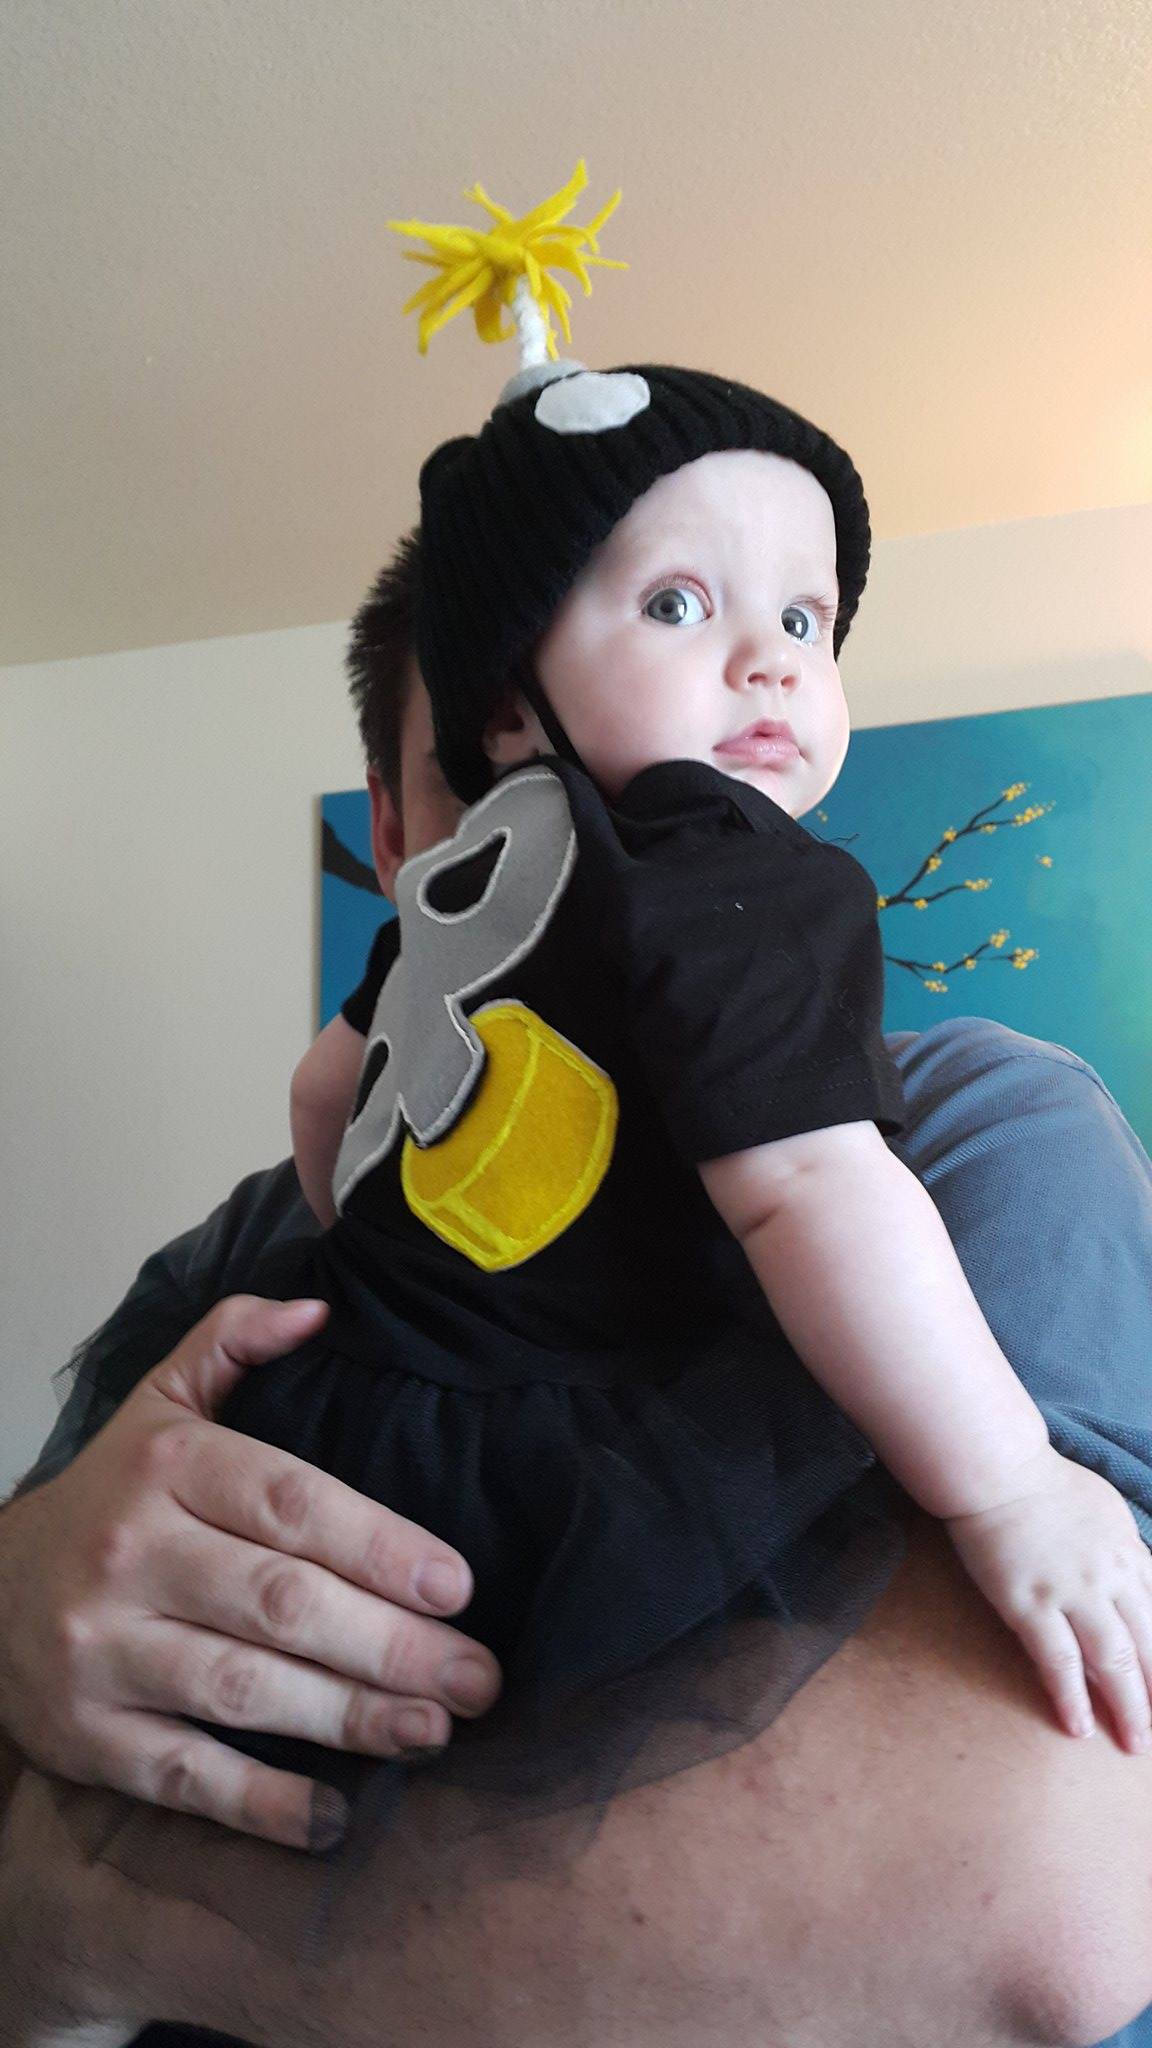
I knew I wouldn’t have a lot of time to make a fourth costume when the others had to be cut, sewn, dyed and accessorized but I couldn’t leave my baby Maggie out of the fun! And on her very first Halloween to boot. I needed an easy option though. I had considered dressing her as Yoshi but I knew I wouldn’t have time to sew an entire dinosaur costume and all my attempts to find a pre-made ones were incredibly expensive ($40?! For a baby costume?!!!). In the end I had to rely on my scrappy creativity… and several google searches and movie viewings… before deciding that she’d make an adorable tutu-wearing baby bob-omb.
I found the tutu “Queen” bodysuit for $6.99 and a black puffball hat for $4. After that I hit Walmart for three $0.99 bottles of puff paint and five sheets of $0.23 craft felt. I also robbed a white pipecleaner from the kids’ craft bin. The total cost came to about $15. At one point I had actually priced the fabric and netting to sew the entire thing myself from scratch but even with coupons I couldn’t get the cost under $23. So not only did I save money but I conserved some much needed time by simply altering pre-made items.
The process to make the costume was simple. I started by cutting out the “wind up mechanism” for the back of the costume and sewing it onto the bodysuit. Then I traced it with fabric puff paint to make it really pop. Originally I was just going to cover the “Queen” logo with a piece of black felt but decided at the last minute to make an actual picture of a bob-bomb instead (to avoid any confusion about her costume). I drew the bob-omb picture with puff paint. Once it was dry, I just had to sew the entire felt panel onto the front of the bodysuit.
The hat was even easier to make. I carefully snipped the threads that were attaching the two puffballs to the hat, removing them. Then I cut two white circles out of felt and hand-stitched them onto the front of the hat as “eyes”. I snipped the leftover yellow felt scraps into little pieces, pinched them together in the middle of a white pipecleaner as a “sparking” puff, then twisted the pipecleaner back around itself to make the wick. I used a piece of gray craft felt to make the base, which I had to hand-sew together and to the hat (after running the end of the wick into it and stuffing it with the other remaining felt scraps so it would stand up). The entire project took less than an hour, plus drying time.
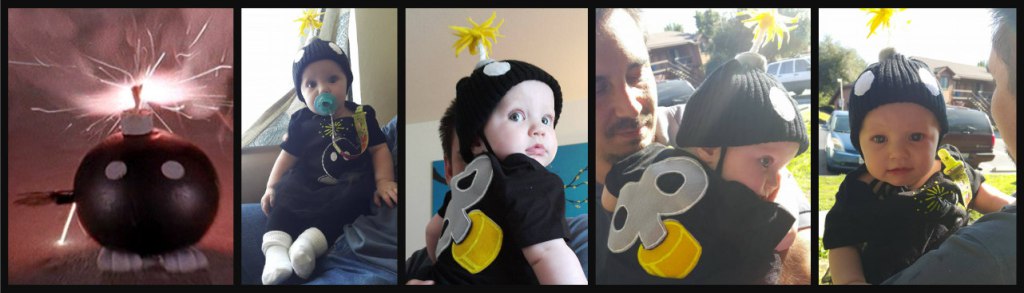
Add black tights and a pair of white socks to complete the look! And Maggie loved it. I was afraid she’d be particular about the hat or tutu, but she didn’t seem to mind (or notice) either one. My husband wasn’t thrilled about being constantly prodded in the face by the bob-omb “wick” when he wore Maggie in the baby carrier but he agreed it was tolerable for a few hours of trick-or-treating.
I’d say this Halloween was a huge success, mostly because the kids loved their costumes and thought the fact that not many people “got it” made them part of a secret club of Super Mario Bros. movie fans. Have you seen the movie? Love it? Hate it? Share your thoughts in the comments… but regardless, you better tell me how cute my kids are! And now, more pictures!
CREDIT:
Lost and Farm, 31 Oct. 2016, https://lostandfarm.wordpress.com/2016/10/31/diy-super-mario-bros-movie-costumes